Guide
Beginner to Pro: My Complete AI Prompt Learning Path for 2026
Most people learn AI prompting randomly and plateau fast. Here's the structured, four-stage path I'd follow if I was starting over — with nothing skipped and nothing wasted.
Published May 7, 2026
🧠 GUIDE INTELLIGENCE REPORT
Core Problem Solved: People new to AI image generation have no structured learning path — they watch ten disconnected YouTube tutorials, read contradictory Reddit threads, and end up with a pile of techniques that do not connect into a coherent skill progression. This guide gives a sequenced, opinionated roadmap from zero knowledge to professional-grade output quality, based on real practitioner experience rather than curated theory.
Primary Search Intent: "how to learn AI prompt engineering from scratch" / "midjourney beginner to advanced guide 2026" / "AI image generation learning roadmap"
Simulated Trending Keywords (As of May 2026):
"how to learn AI prompt engineering 2026 roadmap"— Volume: HIGH — Trend: 📈"midjourney beginner guide step by step"— Volume: HIGH — Trend: 📈"AI image generation skills learning path"— Volume: MED — Trend: 📈"prompt engineering career roadmap 2026"— Volume: MED — Trend: 📈"how long to get good at midjourney prompting"— Volume: MED — Trend: 📈
Target Persona: Complete beginners who have generated a few AI images and are genuinely impressed but have no idea how to get from "random outputs" to "intentional, professional results" — and intermediate users who have plateaued and suspect they are missing fundamental knowledge that would unlock a step-change in output quality.
Step 2: Metadata & Frontmatter
seo_title Beginner to Pro: My Complete AI Prompt Learning Path for 2026
slug beginner-to-pro-ai-prompt-learning-path-2026
excerpt Most people learn AI prompting randomly and plateau fast. Here's the structured, four-stage path I'd follow if I was starting over — with nothing skipped and nothing wasted.
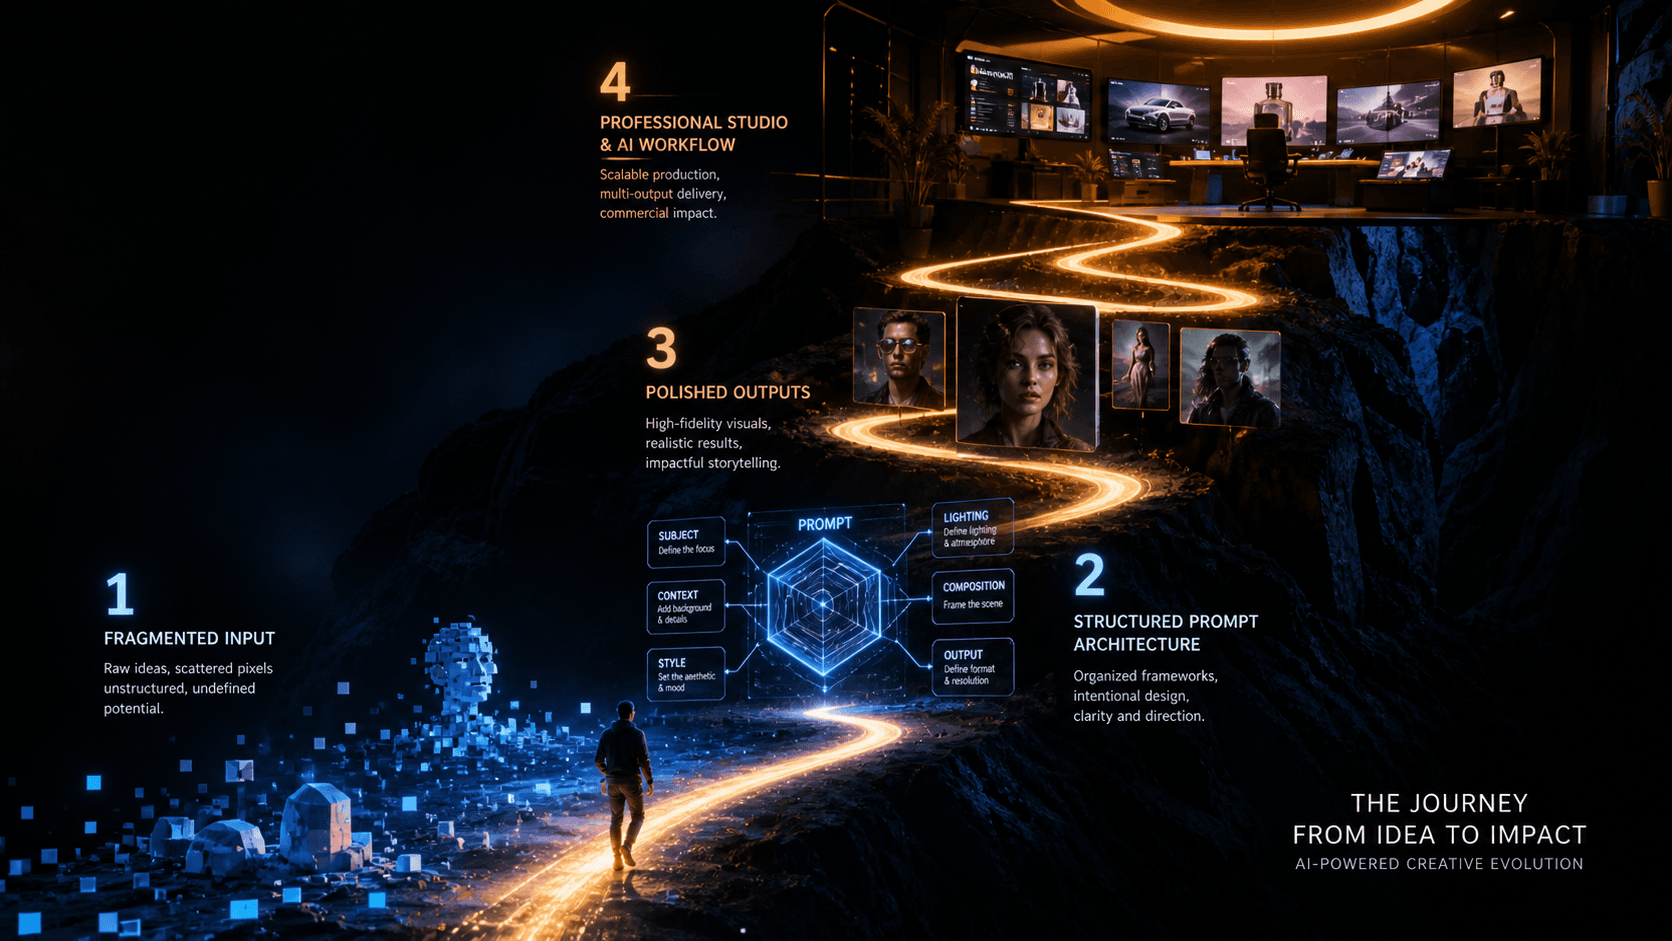
cover_image_prompt Cinematic editorial concept illustration, a winding ascending path through four distinct visual zones — first zone shows basic scattered pixel fragments and rough shapes, second zone shows structured geometric prompt architecture diagrams, third zone shows polished photorealistic portrait outputs, fourth zone at the top shows a professional studio environment with multiple screens showing commercial AI deliverables — the path is rendered as a glowing trail, deep dark background, dramatic upward perspective, electric blue and amber gradient accent lighting, editorial infographic meets concept art --ar 16:9 --style raw --hd
categories Tutorials | Prompt Engineering
Step 3: Markdown Article Payload
When I first opened Midjourney in early 2024, I typed "cool portrait of a man" and got something that genuinely amazed me. I spent the next three weeks doing exactly the same thing with marginally different descriptions. "Cool portrait of a man in a dark room." "Cool portrait of a man with dramatic lighting." I thought I was learning. I was not. I was spinning in place, impressed by randomness.
The real skill jump came later — and not gradually. It came in sudden stages when I finally understood a specific underlying mechanism. Token weighting. Lighting physics. Seed management. Each one clicked and immediately changed the quality floor of everything I produced.
Looking back, the progression was not random. It follows a consistent structure that I have watched repeat in other people I have mentored on Fiverr. There are four stages, and the order matters. Skipping ahead does not save time — it just means rebuilding a shaky foundation later when your work hits a quality ceiling.
Here is the full path, with estimated timeframes and the specific skills that define each stage.
Why Most People Plateau at Stage 1
Before the roadmap: understanding why self-directed AI art learning fails is useful.
The core problem is that AI image generators give you positive feedback immediately. You type something simple, get something impressive, and your brain registers that as "this is working." But impressive-by-default is not the same as intentional. The model is filling your creative gaps with its own training data — you are not directing it, you are approving it.
The plateau happens around week two or three, when the initial novelty wears off and you notice that your outputs are inconsistent, that you cannot reproduce results you liked, and that clients or collaborators notice the "AI look" in your work. At that point most people either quit, or they start randomly adding adjectives hoping quality improves.
The adjective spiral is the second failure mode. More words do not produce better images. Precise words in the right structure produce better images. That distinction is the entire skill of prompt engineering, and you cannot arrive at it through undirected experimentation alone.
Stage 1: Foundations — Weeks 1 to 3
The goal at this stage is not quality. It is understanding what the model is doing.
Most people treat stage 1 as output-focused. Get to impressive images as fast as possible. This is the mistake that causes the plateau. Stage 1 should be mechanism-focused.
What to actually learn:
Start with one model and stick to it. Midjourney is the best choice for beginners because its default outputs are aesthetically strong — this gives you clear visual feedback when your prompts improve. Do not jump between Midjourney, Flux, and DALL-E in week one. You will learn the syntax of three tools and the mechanics of none.
Run the same prompt with one word changed at a time. This is not exciting. It is the most valuable learning activity in stage 1. Take a subject — portrait of a woman — and change only the lighting descriptor across ten generations. soft lighting → hard lighting → window light → studio strobe → overcast daylight. Watch what changes. This teaches you which words carry real visual information and which ones produce the model's statistical average of "lighting."
Learn what aspect ratio does to composition. --ar 1:1, --ar 4:5, --ar 16:9, --ar 2:3 — run the same prompt across all four. The model does not just crop differently; it makes compositional decisions based on the canvas shape. Understanding this early saves enormous confusion later.
Milestone for leaving Stage 1: You can predict, with reasonable accuracy, what a new prompt will produce before you run it — not perfectly, but in the right general direction.
Stage 2: Structure — Weeks 4 to 8
The goal here is replacing intuitive prompting with a repeatable architecture.
This is where the six-layer prompt formula becomes essential. Subject → Subject Modifiers → Environment → Lighting → Camera/Optics → Style/Finish. Every prompt you write for the rest of your practice should use this structure, even when the prompt is short.
Bad prompt (intuitive, no structure):
professional headshot of a business woman, cinematic, beautiful, dramatic lighting, high quality --ar 4:5
Structured prompt (six layers applied):
close-up headshot of a South Asian woman aged 35, confident expression direct camera gaze, dark structured blazer, neutral warm-grey seamless background, large octabox softbox from camera-right 45 degrees 5600K soft butterfly shadow, 85mm f/2.8 medium depth, commercial editorial photography --ar 4:5 --style raw
The structured prompt is longer. But every additional element is doing physical work — you could remove any individual token and describe exactly what would change. That is how you know a prompt is structured rather than padded.
Stage 2 is also where you learn the two most important diagnostic tools: /shorten for identifying which tokens are pulling unexpected weight, and the strip-and-rebuild method for isolating what breaks a failing prompt.
What to actually practice:
Take five of your Stage 1 prompts and rebuild them using the six-layer structure. Compare outputs. Document what specifically improved. The documentation step is not optional — writing down what changed cements the understanding in a way that "generating more images" does not.
Milestone for leaving Stage 2: You can look at a bad output, identify which layer produced the problem, and fix it with a targeted one-layer change rather than rewriting the whole prompt.
Stage 3: Control — Weeks 9 to 16
This is where professional output quality becomes accessible.
Stage 3 is entirely about parameters and their mechanical interactions. Seed management. Chaos calibration. Character weight and --cref. The --style raw flag and when not to use it. Version-specific behaviour differences between Midjourney v6, v7, and v8.
At this stage you are not just writing prompts — you are writing prompt systems. A template that generates consistent outputs across a full batch. A seed registry so client work is reproducible. A --cref workflow that keeps faces stable enough for multi-image deliverables.
What to actually practice:
Build your first production template. Pick one output category you want to excel at — editorial portraits, product photography, concept art, whatever aligns with how you want to use AI art — and engineer a master prompt for it. Run it thirty times. Document what varies and why. Lock the parameters that should not vary. This is the single most practical skill exercise at Stage 3.
The stage 3 trap to avoid: Tool hopping. This is the stage where Flux 2 Pro is genuinely attractive because its photorealism for product shots surpasses Midjourney in specific use cases. The temptation is to split your learning across both simultaneously. Resist it. Complete your Midjourney control layer first — the mental model transfers to Flux in about a week once you understand the architectural differences. Learning both simultaneously at Stage 3 splits your feedback loop and slows both.
Milestone for leaving Stage 3: You can deliver a ten-image batch to a client with consistent lighting, style, and (for portrait work) acceptable character consistency, with a revision rate under 20%.
Stage 4: Workflow — Week 16 Onwards
Stage 4 is not about new techniques. It is about speed, systems, and specialisation.
At this stage, you already know how to produce excellent outputs. The remaining skill gap is operational — how fast can you go from brief to delivery? How systematically do you document your prompt library? Have you identified a specific niche where your workflow has a genuine edge?
The prompt library is the most undervalued professional asset at Stage 4. Every tested, working production template is worth more than the time it took to create, because it eliminates iteration cost for every future job in that category. I have templates in my library I built eight months ago that I still use unmodified because they produce exactly what I need. That time compound interest adds up fast.
Specialisation matters more than range. The AI art market in 2026 is competitive enough that "I can generate AI images" is not a differentiator. "I specifically produce editorial-grade executive portraits with demonstrable face consistency across multi-image sets" is a service with an addressable client base and a clear quality bar. Pick your niche at Stage 4, build deep, and price accordingly.
Real-World Gotchas — My Personal Take
The timeframes are minimums assuming deliberate practice. Generating images casually does not progress you through stages. Deliberate practice means running experiments with one variable changed, documenting results, and testing your mental model against outputs before you see them. Two hours of deliberate practice advances faster than ten hours of casual generation.
Stage 2 is where most people quit. Learning structure feels like a step backwards because your outputs temporarily become more predictable and less surprising. Push through. The predictability is the point — you are building control, not restricting creativity. Once the structure is automatic, creativity sits on top of it rather than below it.
You will have to re-learn parts of Stage 3 every major model update. Midjourney v8's improved prompt adherence changes how some Stage 2 structural techniques behave. Parameters you calibrated for v7 need recalibrating for v8. Plan for a recalibration sprint whenever a major model version drops — budget two to three days of focused testing, not ten minutes of reading the patch notes.
Conclusion
The path from beginner to professional AI image output is not about learning more tools or more tricks — it is about understanding each mechanism deeply enough that you can predict the system's behaviour and correct it when it breaks. Work through the four stages in order, treat documentation as a first-class part of your practice, and build your prompt library as you go. The AIPromptHub guides section covers the specific techniques for each stage in depth — a useful reference when you hit the wall at Stage 2 or 3 and need the mechanics explained clearly.