Guide
The Prompt Structure Formula I Use for Consistent AI Results
Random prompts produce random results. Here's the exact layered formula I use to write AI prompts that generate predictable, repeatable outputs every session.
Published May 5, 2026
The first time I delivered a full asset batch to a client and they came back asking for "twelve more in the exact same style," I realised I had a serious problem. I had no idea how I made the first twelve. They were good — genuinely good — but I had written each prompt slightly differently, layered in parameters by instinct, and run variations until something clicked. I had zero documentation. Zero repeatability
I spent the better part of two weeks reverse-engineering my own successful outputs, trying to figure out what structural patterns were producing the results I wanted. What I landed on is a six-layer formula that I now use as the skeleton for every single prompt I write, regardless of subject, model, or use case.
It is not magic. But it is systematic. And systematic beats lucky every time when you have client deadlines.
Why Inconsistency Happens in the First Place
Before getting into the formula, it helps to understand why prompts are inconsistent by default — because once you get it, the formula makes complete mechanical sense.
When you write a prompt without structure, several things break simultaneously. Token priority is random — whatever words end up early in the string get disproportionate weight, regardless of whether they are your most important instructions. Conceptual gaps get filled by the model's training bias, which means the model makes creative decisions you did not ask for. And when you run the same vague prompt twice, the model makes different creative decisions each time, because there was enough underdetermined space for it to explore freely.
Consistency requires constraint. The more precisely you specify each visual layer, the less creative latitude the model has — and the tighter your output variation becomes across generations.
The formula I use imposes that constraint systematically, across six discrete layers, each handling a specific dimension of the image.
The Six-Layer Prompt Formula
Here is the full structure, named by layer:
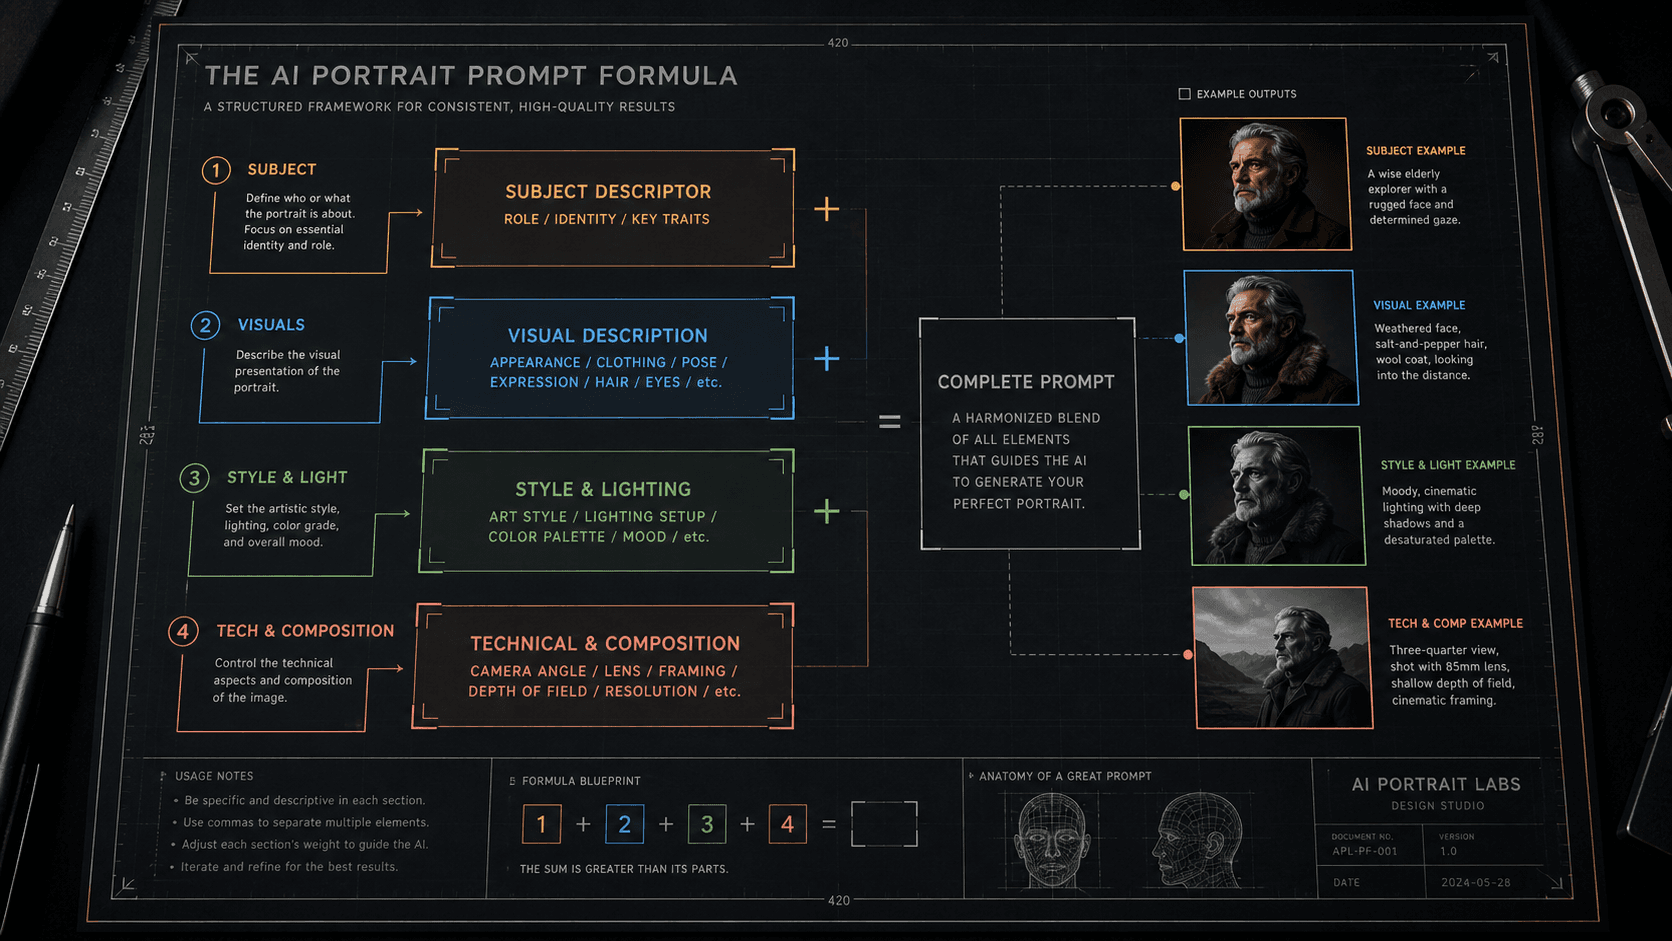
[SUBJECT] + [SUBJECT MODIFIERS] + [ENVIRONMENT] + [LIGHTING] + [CAMERA/OPTICS] + [STYLE/FINISH]
Each layer is separated by a comma. Parameters (--ar, --style, --hd) come after everything else. That is the entire skeleton.
Let me break down what goes in each layer and why the order matters.
Layer 1: Subject
This is the absolute first thing in your prompt, always. One clear noun phrase describing what the image is fundamentally about. No adjectives yet — those come in Layer 2.
close-up portrait of a South Asian man
luxury automatic watch
exterior of a brutalist concrete building
Lead with the noun. The model weights the first tokens highest, so your primary subject needs to own that real estate.
Layer 2: Subject Modifiers
Now the specific attributes of your subject that cannot vary — age, physical details, clothing, expression, material. These are the tokens that define this specific version of the subject rather than a generic interpretation.
35 years old, natural skin texture, visible pores, slight jaw tension, dark structured blazer
stainless steel case, black dial, exhibition caseback visible, light surface scratches
weathered concrete facade, geometric window pattern, oxidation staining on lower panels
Be specific here. Vague modifiers like "handsome" or "impressive" are low-information tokens that contribute almost nothing while consuming attention budget.
Layer 3: Environment
Where is the subject? What surrounds it? This layer handles background, surface, and spatial context.
neutral dark grey seamless background
Italian Carrara marble surface, soft shadow falling left
overcast urban street, shallow depth pulling background to soft blur
Keep environment descriptions proportionally shorter than subject descriptions — unless the environment is the subject. The model should spend more render budget on your primary subject than on what is behind it.
Layer 4: Lighting
This is the layer most people underspecify, and it is why AI images often look "lit from nowhere." Describe lighting the way a photographer would brief a gaffer: source, direction, quality, and temperature.
single hard key light from camera-left at 45 degrees, no fill, sharp shadow falling right
soft north-facing window light, diffused, cool 5600K, subtle rim on right shoulder
overhead product softbox, even fill, no harsh shadows, clean specular highlight on dial
Name the source as a real-world object. "Dramatic lighting" tells the model nothing. "Single bare strobe from camera-right" tells it exactly what physics to simulate.
Layer 5: Camera & Optics
This layer produces the photographic realism that makes AI images look like photographs rather than renders. Focal length, aperture, and camera format all produce distinct visual signatures in the training data.
85mm f/1.8, shallow depth of field, subject sharp, background fully resolved to bokeh
50mm f/8, full depth of field, corner-to-corner sharpness, medium format compression
100mm macro equivalent, extreme foreground detail, slight motion blur in periphery
The model has seen millions of photographs tagged with these technical specs. Using them activates the correct optical behaviour from training data rather than making the model guess.
Layer 6: Style & Finish
Last layer, always. Style keywords carry heavy conceptual weight and will pull the entire generation toward their aesthetic logic if placed earlier. By putting them last, you let the first five layers establish the image's physical reality before style influence kicks in.
photorealistic, commercial photography aesthetic, clean colour grade
cinematic colour grade, slight highlight roll-off, analogue film grain
editorial fashion photography, high contrast, desaturated shadows
Before and After: The Formula in Practice
Here is the same subject prompted badly versus with the formula applied:
Bad prompt (no layer structure, critical info buried, style keyword too early):
cinematic moody portrait of a man in a suit, photorealistic, dramatic lighting, high quality, 8K, professional headshot, detailed face --ar 4:5
Good prompt (six layers applied in order):
close-up portrait of a South Asian man, 38 years old, strong jawline with short stubble, dark navy structured suit, direct camera gaze, neutral dark charcoal seamless background, single key light from camera-left at 45 degrees warm 3200K no fill, 85mm f/1.8 shallow depth, photorealistic commercial photography --ar 4:5 --style raw --hd
The outputs are not comparable. The first generates something competent and generic. The second consistently generates a specific, commercially usable image that I can brief clients on.
Second example — product photography:
Bad prompt:
luxury watch product shot, dark background, beautiful, cinematic, 8K, studio lighting, professional --ar 1:1
Good prompt (formula applied):
luxury automatic watch stainless steel case with black dial::2, positioned on matte black acrylic surface, slight left-to-right rake angle showing depth, single overhead softbox 5600K with small specular highlight on bezel, 100mm macro equivalent f/4 moderate depth, clean commercial product photography, neutral colour grade --ar 1:1 --style raw --hd
The ::2 weight on the watch description in that second prompt is doing extra work — because "luxury automatic watch" is competing with strong conceptual tokens and needs explicit priority boosting to stay dominant.
Real-World Gotchas — My Personal Take
Layer 6 style keywords can still override Layer 1–5 if they are heavy enough. Putting "oil painting" or "anime" last reduces the damage, but some style tokens are so heavily weighted in training data that even last position is not far enough. In those cases I either remove the style keyword and describe the qualities I want instead ("thick visible brushstrokes, textured canvas surface" rather than "oil painting"), or I neutralise it with a ::0.5 weight.
The formula works across models but Layer 5 syntax varies. On Midjourney v8.1, camera terms work as plain text within the prompt. On Flux 2 Pro, those same terms produce much more physically accurate results if written in photography notation (f/1.8 rather than "f1.8 shallow focus"). Run the same formula through each model once and document what calibration each one needs.
Layer 3 (environment) is where most clients ask for changes. In my Fiverr workflow, I keep Layers 1–2 and 4–6 locked in a template per project, and I only swap Layer 3 between deliverables. This keeps lighting, optics, and style consistent across a batch while varying the contextual setting. It cuts my re-prompt time significantly.
Do not add layers you do not need. If your subject is the only thing in the frame and the background is neutral, Layer 3 is just neutral background — two words. Padding it with unnecessary environment detail steals token budget from the layers that matter. The formula is a structure, not a minimum word count.
Conclusion
Prompt consistency is an architecture problem, not an inspiration problem. Using a fixed six-layer structure forces the model into a constrained solution space, which is exactly what makes results reproducible across sessions. Start with the formula as a skeleton, calibrate it once per model, and document the templates that work. The AIPromptHub gallery has tested examples built around this kind of layered structure — worth studying if you want a reference point before building your own library from scratch.